Howdy, folks. This will be the first installment of what we hope will become a regular feature around here. Each Tuesday, look for an article highlighting a technical aspect of our software. This may be a demonstration of a feature, an explanation of the mathematics that power the tools, or some comments on technical support questions that we're frequently asked.
Today, I'll be talking about the Grid Control feature of our Availability Workbench and Reliability Workbench tools. If you've used our AvSim or FaultTree+ software, you know the power of the tool, and the usefulness of the diagram view to be able to create and edit intricate Fault Tree or Reliability Block Diagrams (RBDs). However, sometimes you may find that you have to do some task, such as text entry, or finding and replacing some information, that can be cumbersome to perform in the diagram view.
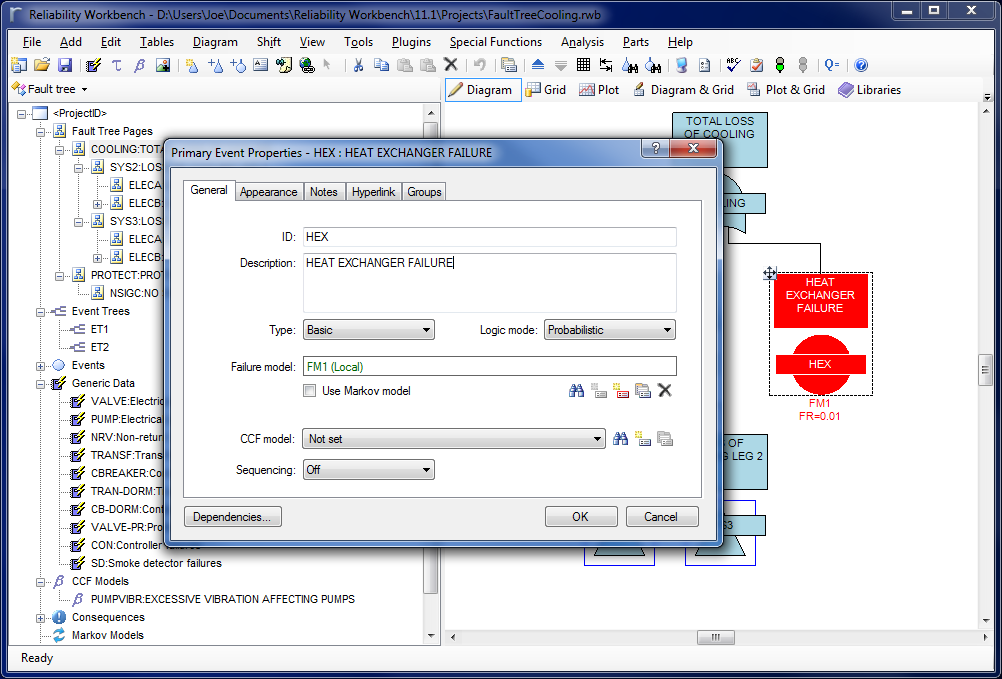
For instance, suppose you've created a large, multi-page Fault Tree, and now you want to add unique IDs and descriptions to all the gates and events, so you can identify what each one represents. To do this in the diagram view, you'd need to locate each item individually, double-click to open the Properties dialog for the gate or event, set the ID and description, click "OK" to close the dialog, find the next item, rinse, and repeat. There's a lot of back-and-forth between mouse and keyboard, and hunting through the diagram for the items you want.
The Grid control helps with this by providing a tabular format for editing data, similar to what you'd see in Microsoft's Excel or Access products. Each gate or event appears on one line of the grid, and you can use the cursor keys, or the tab key, to navigate the records and fields. To edit some text, simply highlight a field with the mouse or keyboard and start typing, or press Enter on your keyboard.
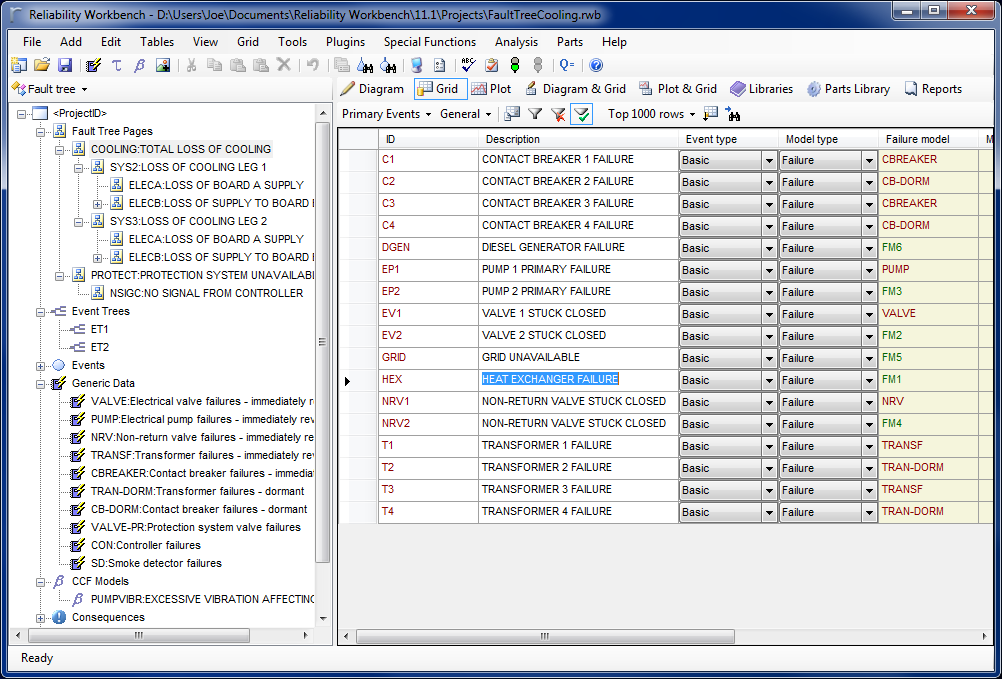
From the grid view, you can use the table selector to choose which data you want to display. This might be the Gates, Events, or Failure Models table in FaultTree+ , or the RBD Blocks or Failure Models table in AvSim.
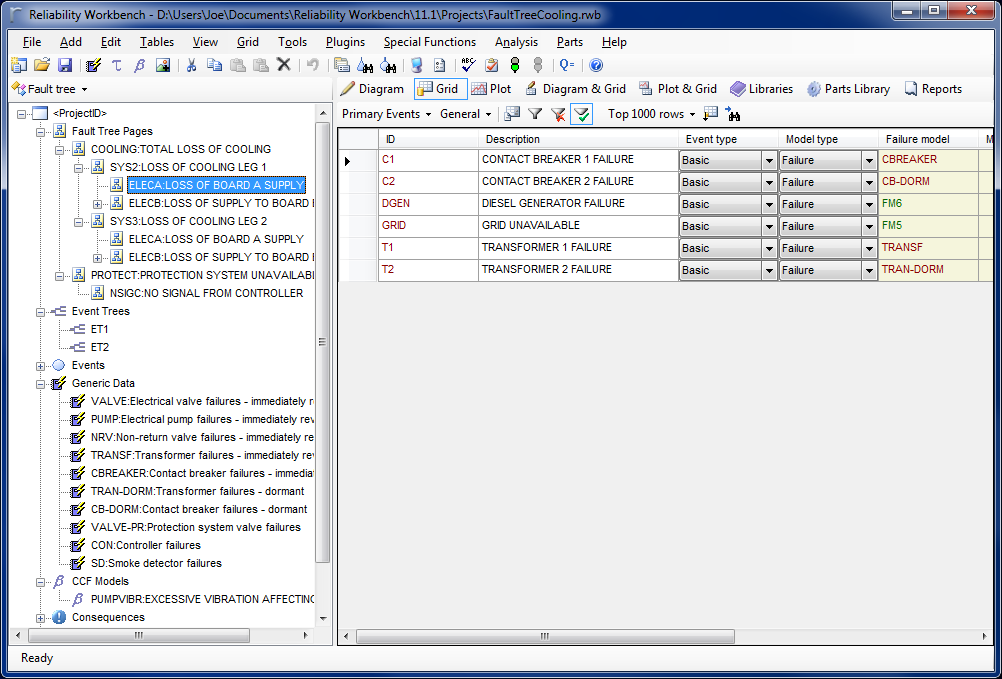
With a given table selected, you can refine which records should be displayed by using the "Filter Grid by Tree Control Selection" option, found in the Grid menu. This mouthful-of-a-name simply means that data will only be displayed in the Grid if it's relevant to the selection in the tree control on the left hand side. For instance, selecting a particular gate in the Fault Tree hierarchy will only show events under that gate, or selecting a Failure Model group in the AvSim project will only display failure models in that group.
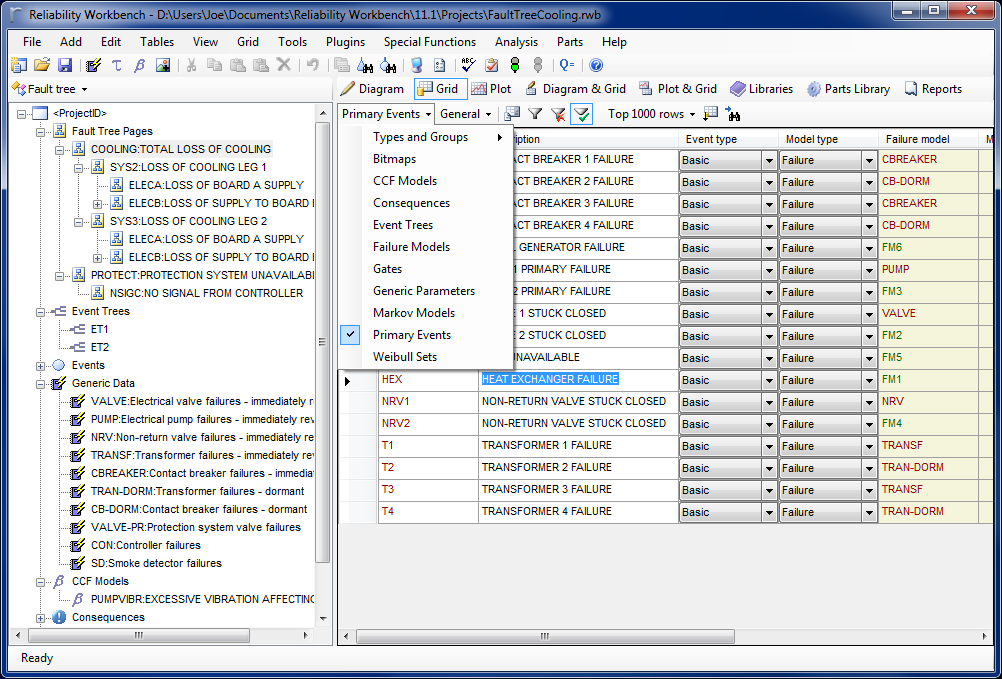
There are plenty more options in the Grid view that allow you to choose what data is displayed. You can use the Grid Layout options to choose what columns should be displayed, and what their order should be; the Grid Filter provides further methods of filtering records; and the Grid Sort allows you to choose how the records are sorted. And any custom grid layout, filtering, or sorting you've created can be saved, so you can share it with your colleagues or transfer it to a new computer. You can even copy and paste data directly from the Grid view to a spreadsheet application like Microsoft Excel.
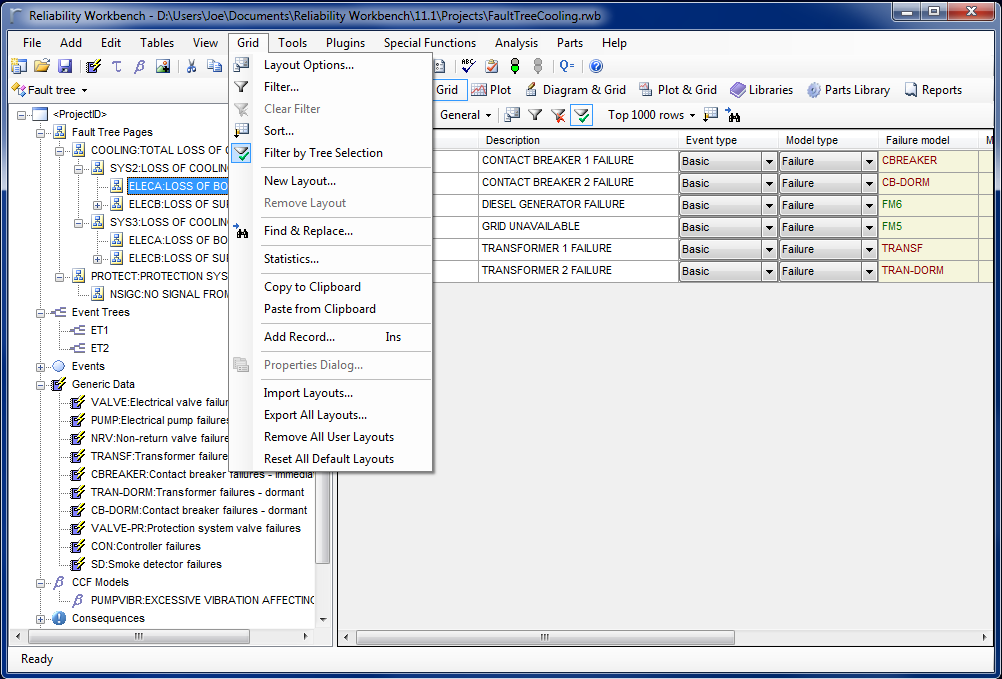
There's even a Find & Replace feature, for when you need it. The cool part is, when you use Find & Replace, it will only apply to the currently-displayed records. If you use a filter to hide certain rows, they won't be included in the replacement.

And for those times when you want the Properties dialog, you can just double-click the grey space to the left of a grid row to open the Properties dialog for the item.
Why don't you take a look at the Grid control, and try it out? I've found it to be a great tool to use when quickly building or editing a project.